
If your Geeni light bulb isn’t connecting to your Wi-Fi network, then you may be experiencing network connectivity issues due to errors in your device and/or router. Before considering a replacement, we recommend these fixes first:
- Initiate a soft reset
- Update your smart home app
- Switch to a different smart home app
- Use a 2.4GHz Wi-Fi network
- Check your router connection
These five user-tested solutions will cover the majority of connectivity issues that may prevent your Geeni bulb from linking with your home network, addressing their most likely causes in your smart bulb, mobile device, router, and smart home app.
By following the fixes below, you should be able to test all possible points of failure, resolving your Geeni light bulb’s connection problems or, at the very least, providing Geeni support with valuable diagnostic information. We’ll walk you through them!
Troubleshooting a Geeni Light Bulb That's Not Connecting
Reset Your Geeni Light Bulb
Before attempting any other fixes below, we recommend resetting your Geeni Light Bulb first! This involves turning the light bulb on and off and reconnecting it to your device through your smart home app.
This clears any temporary glitches and restarts the connection process, erasing any undetectable errors in your network!
There are two ways to do a reset on your Geeni light bulb: Easy Mode and Access Point (AP) Mode. These modes accomplish the same outcome, although AP Mode is a bit more involved and will allow you to manually select your specific Geeni smart bulb.
We recommend Easy Mode for a fast reset procedure and AP mode if you have other active Geeni smart bulbs while fixing your malfunctioning bulb.
That said, the reset instructions below are for the Geeni app, although other smart home automation apps (like Smart Life or Tuya) also allow for resetting through the same modes.
If you use a smart home app other than Geeni, we recommend following the steps according to your app’s instructions.
Reset with Easy Mode
Easy Mode is the quick pairing set-up that automatically selects your smart bulb upon attempting to pair - a fast process for a smooth and convenient reset.
- Turn your Geeni light bulb on and off three times via its switch or by twisting it in its socket. This removes any built-up electricity and disconnects it from your Geeni app.
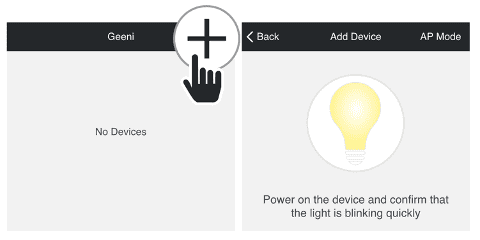
- In the Geeni app, navigate to Devices and select the ‘+’ symbol in the top right corner of the screen.
- Your Geeni smart bulb will then flash quickly. When it does this, tap on Next Step.
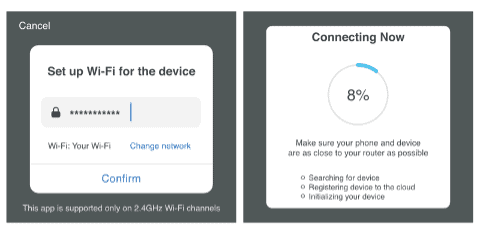
- Enter your Wi-Fi network and password, and select Confirm.
Your Geeni app will now try to connect to your smart bulb. Once finished, you have fully accomplished the reset.
Reset with Access Point (AP) Mode
AP mode is slower and will require you to choose your smart bulb from your network list - best for picking it out of multiple smart home devices. Do this method if you have multiple active Geeni light bulbs and need to single out the faulty bulb.
- Switch your Geeni light bulb on and off three times via a switch or twisting it in its socket. By doing this, you totally remove any remaining charge in the bulb and unlink it from your Geeni app.
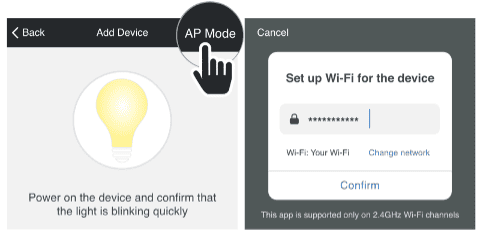
- Go to Devices on the Geeni app and tap on the ‘+’ symbol in the top right corner of the screen. This will prompt your Geeni bulb to flash, indicating that it’s ready to pair.
- Select AP Mode on the top right and enter your Wi-Fi credentials.
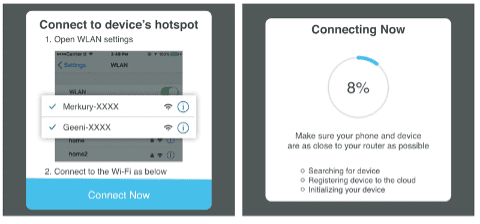
- On the list of networks that appear, select the faulty Geeni smart bulb and tap on Connect Now.
Your Geeni app will then process your device’s connection to the smart bulb. When this is done, you have completed the reset.
Update Your Smart Home App
Keeping your smart home app updated is key for maintaining connectivity with your Geeni light bulb. App developers regularly release patches, fixes, and improvements that could resolve the issue of your Geeni light bulb not connecting.
Thankfully, updating your smart home app can be done in a few minutes for both Android and iOS devices!
Updating your smart home app on an iOS device
To update your smart home app on an iOS device, open the App Store, and tap your profile icon in the top right. On the next menu, under Upcoming Automatic Updates, scroll down until you see your smart home app and tap on Update next to its entry to begin updating it!
You can also opt to update all your outdated apps by tapping on Update All right under Upcoming Automatic Updates. This will cover all apps with pending updates as well as your smart home app.
Once you’ve selected either Update or Update All, the update for your smart home app will automatically be downloaded and installed. When done, select Open right next to its entry on the list of apps to confirm your updates.
After confirming your updates, reset your Geeni smart bulb following the instructions in the section above, and then reconnect it to your device as normal. Your smart bulb should now work with your updated app!
Updating your smart home app on an Android device
For Android devices, start by opening the Google Play Store and tapping on your profile picture in the top right of your screen. In the next menu, select Manage apps and device - this opens a menu where you can make changes to your apps.
Under Overview you should see two options: Update all and See details. Select See details to open a list of apps and see their update status. On that list, scroll to your smart home app and hit the Update next to it - starting the update’s download process!
Alternatively, you can select Update all instead of See details to begin updating your smart home app along with all other outdated apps on your device. This will cause them to begin downloading their app’s update packages - your smart home app included!
Once installed, open your smart home app to finalize the updates. Afterwards, reset your smart bulb using the steps explained in the previous section, and connect it to your device as usual. Your newly updated app should now clear up your connectivity issues!
Switch Your Smart Home App
If connectivity issues persist even after updating your smart home app, try linking your Geeni smart bulb to a different smart home app. Your current smart home app may be bugged due to internal errors or incompatibilities with your device.
Switching to popular alternatives like Smart Life, Amazon Alexa, and Tuya Smart can provide better connectivity as they may turn out to be more compatible with your system. This frees you from any lingering software glitches in the old app.
How to switch your smart home app
To switch your smart home app, you’ll need to unlink your Geeni smart bulb from your current app. The process for doing this varies according to the smart home app, but you’ll generally just need to go to your smart bulb’s device settings and disconnect it from there.
Once you’ve accomplished that, download the new smart home app from Google Play Store or the Apple App Store.
When finished downloading, open the new app and follow the on-screen pairing instructions to connect your Geeni bulb. You may need to create an account if it's your first time using the app.
Once connected, test controlling your Geeni bulb through the new app interface. If functionality is restored, you can continue using this alternative smart home platform going forward.
Use a 2.4GHz Wi-Fi Network
Switching your Wi-Fi network frequency band can help resolve connectivity issues with your Geeni light bulb.
Geeni bulbs only operate on the 2.4GHz band (which is more suited for multiple long-range connections), not the newer 5GHz band (which is more suited for high-speed, short-range connections).
If you have a dual-band Wi-Fi router that simultaneously transmits both bands, then you should be able to connect to 2.4GHz mode automatically. Doing this is easy - reset your Geeni bulb as shown earlier and connect it to your 2.4GHz network!
However, if you have a single-band router or a dual-band router that only transmits one band at a time, then you’ll have to switch it to 2.4GHz using the router’s administrator controls.
Switching from 5GHz to 2.4GHz frequency band
The procedure for accessing your router’s admin controls will depend on your router’s model and your Internet Service Provider. You can check for this by referring to your router’s manual or contacting your ISP for instructions.
In general, you’ll need to enter your network’s default gateway in your web browser (which you can identify via the command terminal on a PC) and log in to your router’s administrator page to change the band. Here’s a helpful video showing the process:
Keep in mind that switching your Wi-Fi frequency band will disconnect any devices that don’t recognize your 2.4GHz network. If the issue still persists, however, then it may be time to examine the router itself for any issues.
Check Your Router Connection
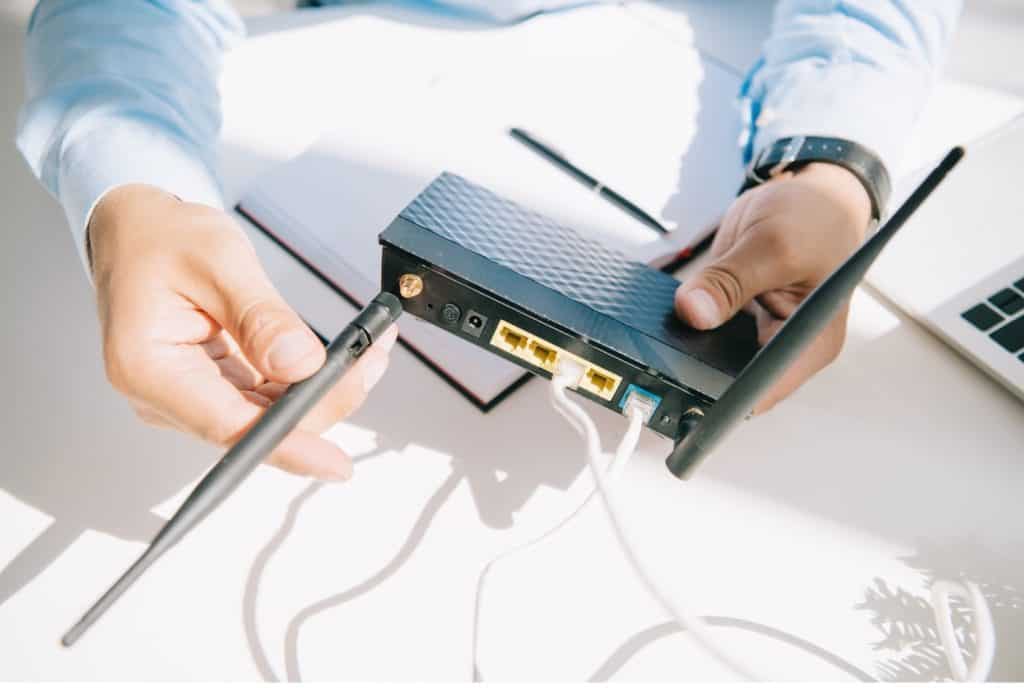
Problems with the router’s connection and specifications can prevent your Geeni bulb from linking with your mobile device. These issues can include disruptions to your router’s signal as well as issues within the router’s hardware itself.
For instance, outdated or low-quality routers will struggle to support more than five smart home devices at the same time - your Geeni smart bulb included.
This coupled with disruptions to its signal such as thick obstacles and other wireless devices makes it impossible for a new Geeni light bulb to connect. Here’s how to deal with them both:
Remove disruptions to the router’s signal
First, eliminate external disruptions muddying your router’s connection. The two most frequent culprits for this are signal obstructions and excessive distance between the router and the devices.
For instance, solid walls, furniture, and other wireless devices can degrade the signal’s quality, causing your Geeni light bulb not to connect.
If possible, ensure that your router is close enough to your Geeni smart bulb to support it, with the device being no more than 100-150ft away from your router indoors and 300ft away outdoors.
Likewise, keep the connection between your bulb and router clear of any walls, furniture, and active wireless devices such as Bluetooth gadgets.
By removing these disruptions to your router’s signal, you increase your Geeni smart bulb’s connection quality and prevent it from plateauing at speeds that disconnect it.
Examine the router itself
Low-performance router software and hardware may be why your Geeni light bulb fails to connect to your device. It’s reasonable to suspect this as the culprit especially if you’ve eliminated signal disruptions and have set your Wi-Fi frequency band to 2.4GHz.
At this point, it may be worth considering a direct hardware upgrade. We recommend contacting your ISP and consulting their associated network technician - they should assist you in identifying the upgrade best suited for your smart home set-up.
While a costly fix, this is a worthwhile investment if you plan to keep up a large smart home system. Hence, investing in a robust Wi-Fi foundation pays dividends for not only getting your Geeni bulb back online, but enhancing all smart home activities.